The ‘what you see is what you get’ editor allows you to add content and style your pages without knowing HTML (the language used to write web pages).
Below is a guide to the different functions and buttons on the editor.
Skip ahead to:
'WYSIWYG' menu items

Pages
This takes you to the main Website Pages area, where you can view a list of all pages you have permission to edit. From this screen, you can add, delete and rename pages.
Content
This brings up the main content window, where you can use the WYSIWYG editor to add content to and edit your page. For detailed information on the WYSIWYG interface go to the content menu section, below.
Properties
Page Type
There are three types of page type to choose from. Normal, email form and redirect. Normal will be your standard pages, email form lets you set up a form page to get information from your members and redirect lets you make a page that automatically redirects to an external page (this is of more use to site admins).
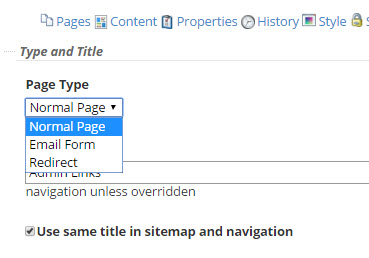
Form pages allow you to add standard HTML form elements to a page and have the contents of the form emailed to a specified email address when the user submits the form. To create a form page, select ‘Form Page’ from the page type options and then select the ‘Edit Form Details’ icon that now appears in the page options. After specifying an email address to send to form results to in addition to the email address the result will come from and the subject line (Which can help in filtering returned forms into a specific email folder), you can build up the form by editing the page’s text and adding any standard HTML form element.
Warning: Be sure not to add an actual <form> tag to the page, this will stop the form from working and no results will be sent.
Page Title
The title of the page appears in your browser and in the breadcrumb navigation. Having an accurate title helps with search engine optimisation.
Page Security
This sets the viewing permissions for the specific page you are editing. 'member' and 'admin' options are only relevant for pages that have an owning organisation.
Setting 'advanced' uses the viewing permissions that have been specified in the security section (website admin > edit pages (advanced))
The metadata tab allows you to link an image, apply image alt text, and add a page description.

History
Every time a change is published for a page a 'version' is created. This is accessible through the 'history' link in page edit mode. You can add notes to each version you publish, to make it clear what has changed between versions.

By navigating to the 'History' tab in the WYSIWYG editor, you can view a list of all versions of the page since its creation.

 In the page history, you can view edits within the content, CSS and Javascript tabs
 You can compare versions by clicking on the magnifying glass next to any version.
 You can also revert to any previous version of the page, go to the History tab and check the checkbox next to the version you want to make current.
Style
Choose the skin and template used by the page, and apply additional stylesheets to it.
View page
This takes you out of editing mode and to the live version of the page you are editing. If you have made changes to your page, remember to save your work-in-progress before using this link.
Back to top
'WYSIWYG' tabs

Content
Edit a page either through Website Admin > Edit Pages, or use the quick ‘Edit Page’ link when viewing the page.
There are two methods of adding text and other content to the pages you create; WYSIWYG editing and HTML editing.
WYSIWYG editing
The first (and default) method is by using the WYSIWYG (What you see is what you get) editor built into the website. This editor allows you to both add and style content using a familiar word processor style interface. You can set different headers, format text, add images and change colours etc. in real-time. Also, the widget name on the widget list now links directly to the widget setup page.
HTML editing
The second method is to add the HTML content by hand yourself. This gives you much greater control over the content that is added (The WYSIWYG editor is not perfect and can cause some content to not appear as you would want it to).
This method is recommended only for people with at least a basic knowledge of how HTML is written.
CSS and JavaScript
Any styles added to the CSS tab get linked by a stylesheet called 'styles.css', which gets applied to the page last.
Any javascript added into the tab will get added to a file script.js and linked to the current page.
Widgets
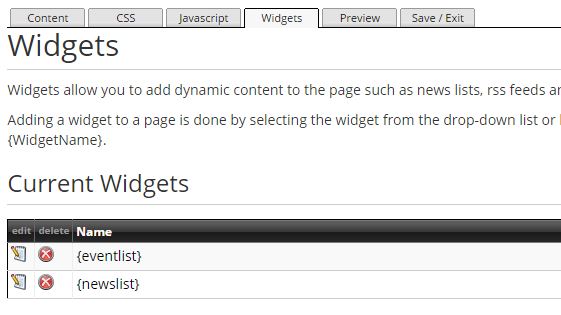
Widgets allow you to add dynamic content to the page such as news lists, RSS feeds and photo galleries.
To add a widget to a page click ‘Create New Widget’ and select the type of widget from the list. Many widgets have a number of properties that you can alter. These may change how a widget is displayed, what data it uses or when it appears. If the widget you are implementing is to display member data, please ensure that you have it configured correctly.
Once you have made a widget, adding it to a page is done by selecting the widget from the drop-down list or by typing the name of the widget into the page enclosed in two curly braces e.g. {WidgetName}.
Copying Widgets
If you want to duplicate the set up of an existing widget on a page, you can do this using the 'copy widget' function.
To copy a widget, navigate to the 'Widgets' tab in the page editor.
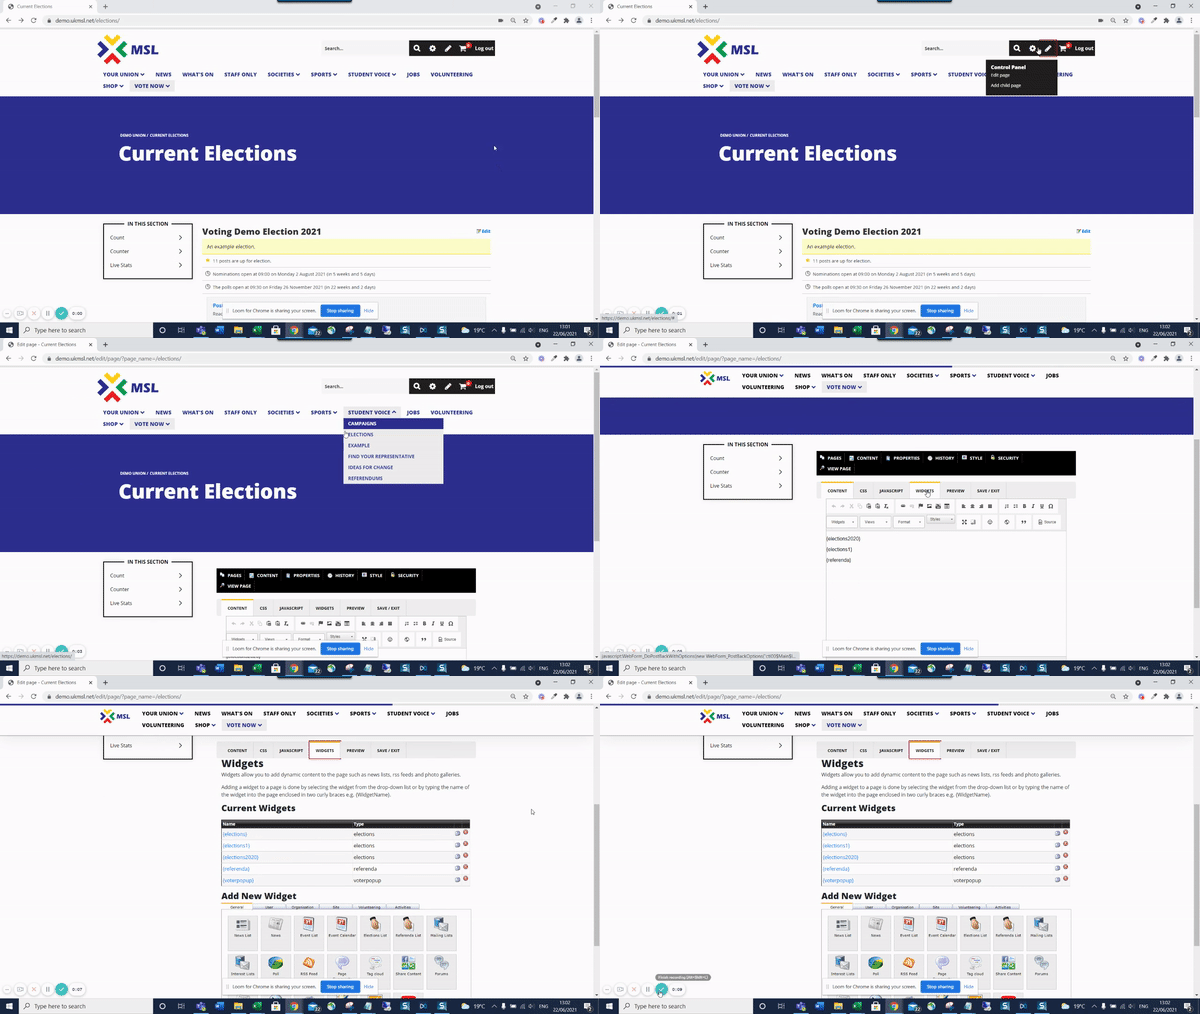
On the 'Widgets' tab, locate the widget you wish to copy and select the 'copy' button.
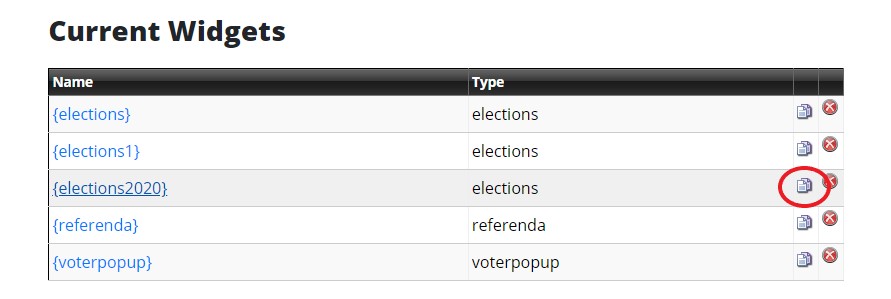
This will recreate the existing widget including any settings you have applied to it and take you straight to the widget editor for the newly copied widget. (You will be able to tell which is the copied widget, rather than the original version because the system will automatically append a number to the end of the widget name).

You can then edit the widget settings and save it to your page content as required.
Preview
The preview tab allows you to see how your content will look once saved. It will load in the widgets you have added and apply any CSS styles available on the page. It is always advisable to preview your changes before saving.
Saving
Once you have made your changes, open the Save/Exit tab where you are given the option to “Publish” which saves your changes and publishes your changes to the website, or “Save” which saves your draft content but doesn't publish the content to the website.
Make sure you give a brief description of what you have changed in the notes section to help other editors (and yourself at a later date) understand what changes you have made and why.
There is also a Save button below the editor itself, where clicking Save (regardless of whether you're in WYSIWYG or standard mode) ?saves the current user's draft but doesn't publish the content to the website.
Back to top
'WYSIWYG' content menu

The message template editing screens also allow permitted tokens to be presented in a dropdown on the editor toolbar.
Source 
This allows you to quickly look at the HTML of the page you are editing. If you are copying and pasting text into the editor it can often contain stray HTML (particularly if copied from a webpage) so it is always advisable to copy your text into Notepad first which cleans out all formatting.
Find 
You can find or find and replace text in the page.
Clear formatting 
This allows you to quickly remove inline styles such as bold and italic or text colour from your page without affecting headlines, paragraphs and links.
Hyperlinks and Emails 
Text or images in your page can be set as links to either other webpages (links) or other areas of your webpages (anchors) or to act as an email prompt. Select the subject you wish to convert then click on this and fill in the relevant fields. If you have made an anchor on the page this will be automatically available for you to select. In the advanced options, you can choose to redirect people to a new window if you do not want them to navigate away from your page.
Anchors 
If you have a particularly long webpage that you do not want to make into several smaller pages then you can use the "Anchor" button. This allows you to select text or an image as an anchor. Once you have selected the text or put your cursor next to the text you would like to use as an anchor, click the "Anchor" button. Add a name for your anchor and click "OK".
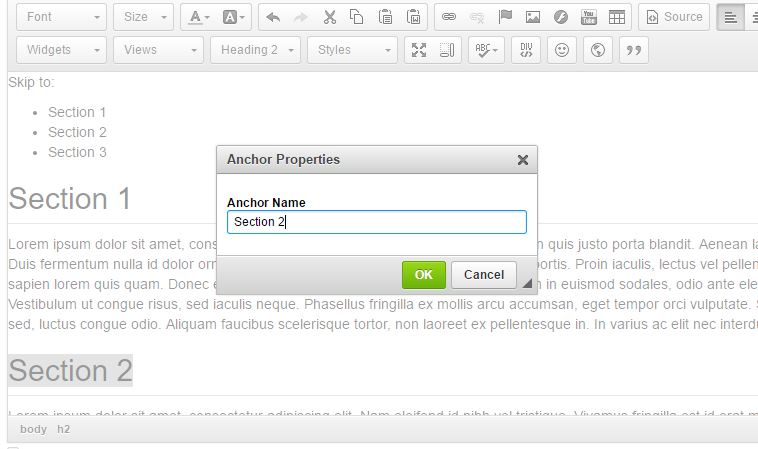
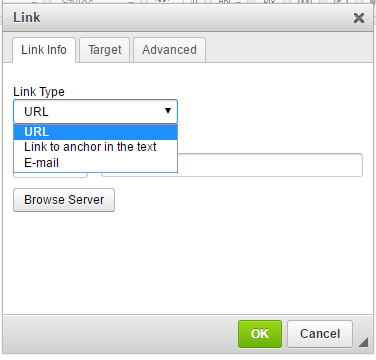
Once the anchor has been created, you can link to this anchor from other areas of your site or a navigation menu at the top of the page. To link to an anchor on the page click on the "Hyperlink" button and select the "Link to anchor in the text" link type in the drop-down menu. To link from another page or website use the URL of the page followed by /#anchorname
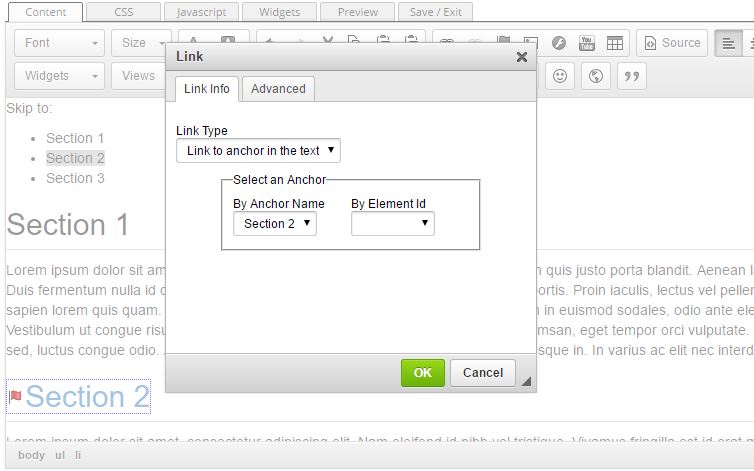
Image uploader/ management 
To add an image to your site place your cursor where you want your image to go then select the "Image" button (which is also accessible from the HTML editor).
Click browse and upload to save your image to the site. You can access other images that have been uploaded, browse other pages of the website or upload from your computer.
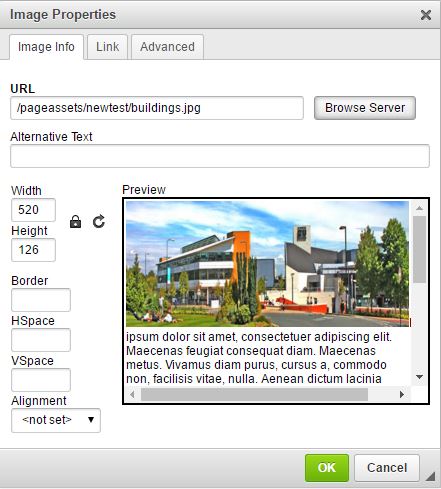
Select the required image and click OK to add it to the page. There are various tools you can select to change the image size and its justification in the page, whether it has a border and how much of a margin it has. Aligning an image left and right now works cross-browser.
Make sure you add alternative text describing what the image is so people who are looking at your site with images turned off can still understand it.
To edit/replace an image, just double click on it in the browser. You can also make the image into a link using the link tab of the popup dialogue.
Embed Flash 
Flash is uploaded and selected exactly like images by clicking the "Flash" button in the toolbar.
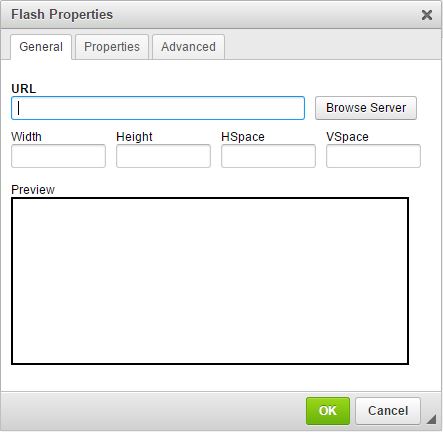
Once you have added the flash you can choose whether it loops and auto-plays through the advanced menu.
Embed YouTube video 
To add a YouTube video to your site, MSL recommends you copy and paste the video URL into the "Paste YouTube Video URL" field.
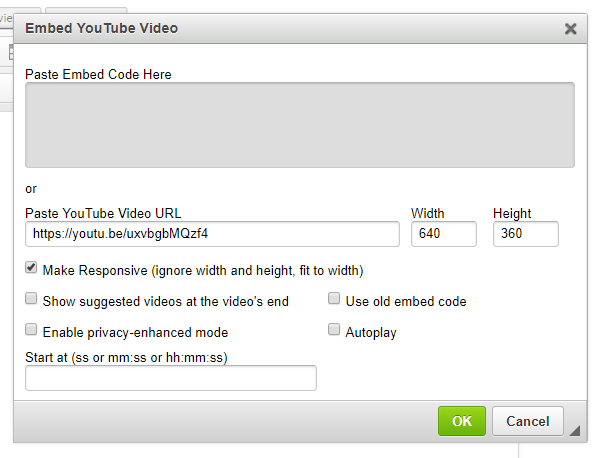
Once you have pasted in the URL, set the other options such as "Make Responsive", "Autoplay" etc.
The embed code for the YouTube video can be pasted directly into the page source but please bear in mind that the video may not be mobile responsive if you add it to the page content in this way.
Upload documents
You can now upload documents using the link icon > 
Hit the ‘browse server’ link to get to your page document storage area – you can add the document and link it in one go.
Embed tables 
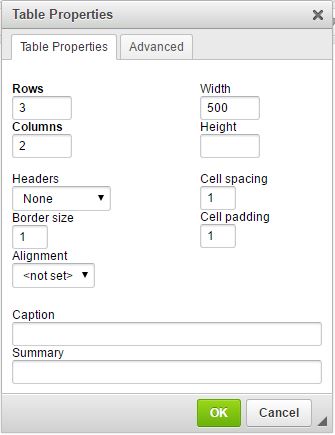
Adding a table to your site lets you format it by adding rows and columns. You can set the size of your table in either pixels or percent and set the padding and spacing of each cell. To edit an existing table, right-click on any existing table to get the table context menu, where you can manipulate rows, columns and cells, or edit the table properties.
Adding widgets to page content 
Once you have created your widget within the "Widgets" tab. If the widget you are implementing is to display member data, please ensure that you have it configured correctly.
You will be able to select the widget you would like to add to your content in the drop-down menu...
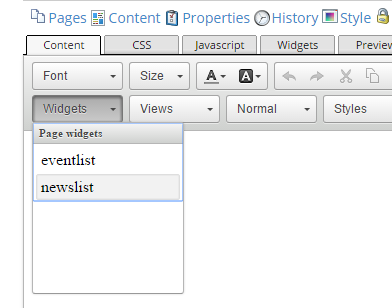
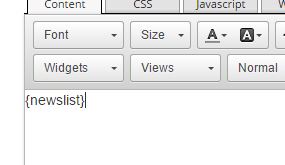
And the widget will be added to your content in the location you specified with the cursor:
Views 
This allows you to have different content in your page for different users. Clubs/ societies could tell non-members why they should join or members that they can sign up for trips and comment on news etc.
To add a view to the page select a view from the drop-down list:
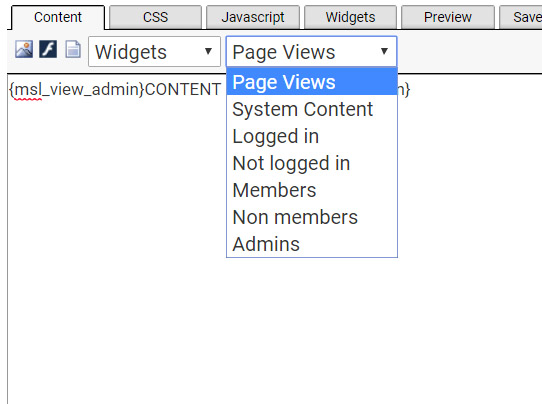
Or add the curly brace tokens:
{ msl_view_notloggedin}CONTENT {/msl_view_notloggedin}
{ msl_view_loggedin}CONTENT { /msl_view_loggedin}
{ msl_view_member}CONTENT { /msl_view_member}
{ msl_view_admins}CONTENT { /msl_view_admins}
Replace 'CONTENT' with the content you want to appear.
On pages with an owning organisation, you have all the above options available. If the page is not owned by an organisation you only have the option of specifying logged in or logged out content.
DO NOT copy and paste the tokens from this page, they contain hidden characters that means they won't work if you copy and paste. Type them into your email if you'd like to use them removing any spaces around the curly brackets.
Formatting text
This is a dropdown list of headings (h1, h2, etc) that you can use to mark up text as a heading. The styles for the headings get picked up from your stylesheets.

Style text
This lets you add several styles to your text including slightly larger and smaller text and strikethrough. You can now customise the styles that users see when they use the styles dropdown by setting any of your skin stylesheets to ‘show in toolbar’.

Back to top
Recent additions to the 'WYSIWYG' content menu
A quick rundown of new features that are in our newest release of the editor. You can add/edit all your toolbars through Website Admin > Editor Toolbars.

Spellcheck
There are two new spellcheck options that you can enable on the toolbar. ‘Spellcheck as you type’ toggles automatic underlining of any misspelt words in the editor. The ‘Spellchecker’ option takes this one stage further and suggests alternatives to misspelt words, lets you find and replace, and includes a thesaurus.
Expand the editing window – then expand it a bit more
There’s a built-in draggable handle in the bottom right of the editor that lets you resize the editor window to get a better view. If that’s not enough space for you, try adding the maximize button to your toolbar. This toggles full-screen mode so you can really see what you’re doing. Just remember to minimize it again so you can get to your save page buttons.
Hide the toolbar
If space is at a premium for you, use the triangle in the corner of the toolbar to show/hide the icons.
See the page structure at-a-glance
Adding the ‘Showblocks’ icon to your toolbar lets you toggle an outline of the page structure on and off. Blocks such as div, p and headings are outlined and labelled in the WYSIWYG editor.
This is a great help when editing a complex layout to make sure that you’re really putting that paragraph in the right place!
Structure your content (‘add div’ option)
The ‘Create div’ option on the toolbar lets you add div blocks without needing to go into the HTML view.
Other new toolbar icons to try:
Back to top